Showing posts with label Vegetarian. Show all posts

Tuesday, July 16, 2013

Potato, Spinach and Garbanzo Bean Curry {GF + Vegetarian}

Potato, Spinach and Garbanzo Bean Curry


A spicy, healthy Potato, Spinach and Garbanzo Bean Curry.  Gluten Free** (omit naan bread) and Vegetarian recipe!
**For Gluten Free, omit naan bread (or use GF version) and always make sure the ingredients you use are clearly labeled Gluten Free, including your spices!


Ingredients:

• 1/4 cup olive oil (or to taste)
• 1 teaspoon mustard seeds or mustard powder
• 1 teaspoon ground cumin
• 1 teaspoon ground coriander
• 1 teaspoon turmeric powder
• 1/2 tablespoon cayenne (or to taste)
• 6 tablespoons curry powder (or to taste)
• 6 tablespoons garam masala (or to taste)
• 1/2 cup chopped yellow onions
• 4-6 cloves garlic, minced
• 1 tablespoon minced fresh ginger or 1 teaspoon ground ginger
• 2 minced jalapeno peppers
• 4 small Yukon Gold potatoes
• 1 can garbanzo beans
• 1 teaspoon salt (or to taste)
• 2 pounds fresh spinach, rinsed, stems removed, and chopped
• 2-3 tomatoes, seeded and chopped
• 1 bunch fresh cilantro leaves; finely chopped


Directions:

1. Wash and peel potatoes. Place them in boiling water to partially pre-cook, about 10-minutes. Remove from water and cube. 
2. Heat the oil in a large pan over medium-high heat. Add the mustard seeds and cook, stirring, until they pop. Or, add mustard powder if you don't have the seeds. Add cumin, coriander, turmeric cayenne, curry powder and garam masala and cook, stirring constantly for 30 seconds until fragrant. 
3. Add the onions, the (cubed, partially pre-cooked) potatoes, garlic, ginger and jalapenos and cook for approximately 10-15 minutes. 
4. Add the garbanzo beans followed by the spinach; cook until the spinach is wilted. 
5. Add the tomatoes and cook over medium-low heat until curry is thickened, approximately 15 to 20 minutes. 
6. Add the cilantro and stir well. 
7. Serve hot over quinoa or rice if following a Gluten Free diet OR with naan bread if not on a GF diet. 

Sunday, July 7, 2013

Three Courses of French Vegetarian Goodness

Three Courses of French Vegetarian Goodness:

Braised Baby Artichokes over Brown Rice with Tomato Coulis & Goat Cheese Stuffed Roasted Tomato
Now, anyone familiar with French food will probably be wondering how I could pull off a decent, multi-course French dinner given my status as vegetarian and subsequent lack of desire to prepare, let alone eat, a meaty dish.  

But, happily for me, one of my more productive means of procrastination is perusing online cooking and recipe sites for recipes that sound particularly interesting, challenging, or which meet some other criteria I've deemed of the utmost importance (most recently, I've been pursing BBQ'd meat substitutes). 

On one of my many sojourns through the wonderful world of online cooking resources, I came across a set of recipes on Food and Wine magazine's website, intriguingly titled: "French Provincial Vegetarian."  I clicked the link excitedly and found myself anything but disappointed.  

In fact, I was quite happy to be staring at a French Vegetarian menu developed by Chef Alain Coumont.  


The menu included:
Alterations:

As usual, I made some alterations to the original recipes (links found above, next to the bulleted menu items) but given my unfamiliarity with French cooking a I was less comfortable than usual with making too many spur-of-the-moment changes.  

Chilled Zucchini Soup
My major cooking intervention came in the form of adding greater quantities of spices than the recipes called for, and occasionally adding an extra clove of garlic or bit more chopped onion or basil.  This was all in the service of producing a more robust flavor and I would recommend that anyone embarking upon these recipes start off with recommended amounts and slowly adapt things to their taste.  

The other major changes I made were to reduce serving sizes and I opted to use canned whole artichokes (HEB brand) rather than preparing fresh artichokes for the artichoke dish.  This eliminated the need to pare the artichokes and then soak them in lemon-water (although I drizzled lemon on the canned artichokes prior to cooking).  This adaptation necessitated that I add the artichokes later in the cooking process than originally called for in order to prevent them from becoming overdone. 

NOTE: Every recipe I made could be made Gluten Free if you are following a GF diet.  It would require using certified GF ingredients but no other alteration to the recipes.

Results:
Although I don't typically tackle multiple dishes when I make dinner (I usually opt for a one course, one-food meal), I found Coumont's recipes to be relatively easy to make (balking popular conceptions of the complexity of French cooking), if still time consuming.  

I was able to make two of the recipes, the chilled zucchini soup and tomato coulis, the day before the dinner and enjoyed the fact that I was able to tackle things across two days rather than slaving away in the kitchen nonstop for a full day.

Mocha Pots, fresh out of oven
Overall, my experiment in vegetarian French cooking was a success.  The artichokes with tomato coulis and brown rice combo. was a hit, and the oven-baked tomatoes stuffed with goat cheese are absolutely heavenly.  

The chilled zucchini soup was good, but less of a pleaser than the other dishes.  It is a nice, light first course, but I feel it needs something like a nice crusty, toasted bread paired with it to be really successful.  

The Mocha Pots for dessert also turned out well.  I made them fresh after dinner so they could be consumed while still warm and I put a healthy dollop of reduced fat whipped cream on top before serving.  All in all, a great night of foodie decadence of the Provencal French Vegetarian variety. 

Monday, May 27, 2013

Harictos Verts and Crimini Mushrooms served with Quinoa, Poached Egg, and Red Wine-Sundried Tomato Sauce

Harictos Verts and Crimini Mushrooms served with Quinoa, Poached Egg, and Red Wine-Sundried Tomato Sauce 


This is definitely a rustic-style comfort food made healthy!  The recipe is vegetarian and gluten free and could easily be varied to accomodate a vegan diet.  I used the sauce over  quinoa, instead of pasta, for a complete vegetarian-friendly protein.  The sauce could very easily be turned into a healthy-style "cream" sauce by adding 0% plain Greek Yogurt.  I actually gave it a try by putting a little bit of the sauce in a separate bowl and mixing it with Greek Yogurt and it added the creaminess of a heavy cream sauce without adding the fat.  I think this variation would be great on pasta!


Ingredients--

  • 1 6oz can Organic Tomato Paste
  • 1 10oz can diced Hot Rotel Tomatoes
  • 1 cup jarred Organic Marinara Sauce (I use Newman’s Own brand)
  • ½ cup diced (or strips) sundried tomatoes (not in oil; add more to your taste)
  • 8 cloves garlic; minced (add less/more to your taste)
  • 1 Bell Pepper (I used ½ red and ½ green); diced
  • Basil; chopped to taste
  • ¼-1/3 cup Red Wine
  • ½ cup water (added to sauce to thin; be conservative)
  • Small handful of cherry or other small tomato (I left smaller ones whole, sliced bigger ones in half)
  • 1-2 cups Crimini (or Baby Bella) mushrooms; sliced in half
  • 2 heaping handfuls Haricots Verts (French Green Beans)
  • ½ cup uncooked Quinoa; prepared according to instructions (this is enough quinoa to serve 2-3 people; remainder of recipe feeds about 2x that so increase quinoa as needed)
  • 1 egg; poached (you need a pot of hot water + vinegar)*
  • Olive oil; to taste
  • Salt + Pepper; to taste (I used about 50/50 regular sea salt and smoked sea salt)
  • Parmesan; grated (to taste / optional)

Directions--

  1. Sautee halved Crimini (or Baby Bella) mushrooms in sauté pan with olive oil and salt and pepper until tender.  Remove mushrooms to bowl and reserve liquid produced while cooking.
  2. In large sauce pan sauté minced garlic and bell peppers in olive oil.  When tender and browned add reserved mushroom “juice,” tomato paste, diced tomatoes, marinara sauce and sundried tomatoes.  Add wine, water, and salt and pepper and allow to cook down for 7-10 minutes on low heat.  Add chopped basil. 
  3. Add Haricots Verts and cook on medium-low temperature for 5 minutes or until beans start to get tender.  Add sautéed Crimini mushrooms and cherry (or other small) tomatoes.
  4. Continue to cook on low heat until Haricots Verts are tender and fully cooked (they should still have a little crunch to them).  Stir grated parmesan cheese into sauce if desired or use as garnish. 
  5. Plate quinoa (I packed mine in a mini-bowl and turned it out on top of my plate to have a molded-quinoa look); top with portion of Haricots Verts and Crimini in sundried tomato + red wine sauce.  Top with poached egg and garnish as desired.
  6. Enjoy with your left-over red wine!
* Not sure how to poach an egg?  See one of my favorite food blogs for instructions: http://smittenkitchen.com/blog/2008/08/how-to-poach-an-egg-smitten-kitchen-style/


Notes on Variations + Dietary Restrictions--

  1. This sauce can easily be transformed into a healthy “cream” sauce to be used over pasta by adding 0% plain Greek Yogurt.  One caution:  Add the yogurt in small batches of the sauce and combine into larger portion to retain yogurt’s live cultures.  Using Greek Yogurt in the sauce will make it taste like a cream sauce without the added fat and calories and will boost the protein considerably.
  2. Recipe is Gluten Free and can be made vegan if poached egg and parmesan are omitted.

Tuesday, February 26, 2013

Zucchini and Shirataki Noodles: Gluten-Free, Low-Carb Pasta Alternatives! {Gluten Free + Vegetarian + Low Carb}

Gluten-Free, Low-Carb Noodles: Shirataki Noodles and Zucchini Spaghetti with Sundried Tomato Pesto
Gluten Free + Vegetarian + Low Carb

I've been interested in non-wheat based, low-carb alternatives to pasta for a while now, and I've hit on two options that I really like.

Shirataki Noodles: 
I can highly recommend the amazing Shirataki Noodle.  Shirtake Noodles boast the following characteristics:  
  • 0 net carbs
  • 0 calories
  • gluten-free
  • 0 fat
  • 0 sugar
  • 0 starch. 
These noodles cook super quickly and are great, especially, in Asian inspired dishes like Pad Thai and Curries, while also being amenable to traditional tomato sauces.  I strongly recommend these noodles to gluten-free and carb-conscious eaters.  I've found them for sale in the same section as tofu, vegan cheeses, and vegetarian deli-style meats.  The only downfall to these noodles is that they aren't as cheap as traditional pastas, nor as cheap as the next pasta substitute I'll discuss: zucchini noodles.

How Do I Cook Them?:
Cooking Shirataki Noodles is simple.  Open the package, dump them in a colander and rinse them thoroughly under water.  Be warned that they will smell funny--I promise they do not taste funny!  After rinsing, dump the noodles into boiling water for 2 minutes.  Remove, rinse, and pat dry with paper towels.  Serve.

P.S.--
Beware the "fake" variety of the noodles made with tofu.  They're still pretty healthy and tasty, but they don't confer the same carb-benefits as the true Shirataki Noodles.


Zucchini Noodles: 
Another healthy gluten-free and lower-carb alternative to traditional grain-based pastas that I've tried out and really enjoy are zucchini noodles.  Zucchini noodles can be super time intensive to produce depending what kitchen tools you have handy.  But, given all of the right tools, you can whip them up pretty efficiently.  

When I first started making zucchini noodles I did everything with a knife--sliced the zucchini into length-wise strips with a kitchen knife and, then, into spaghetti-like strands with the knife.  This took FOREVER.  Seriously, my wrist would get kind of sore. 

Then, I invested in a mandoline slicer (this one, actually).  The mandoline slicer made the zucchini noodles a LOT easier to manage.  It cut the time for producing them down drastically and eradicated the wrist-cramping that I suffered when I only had my knife to help me out.  And, I have to say that it's come in super handy since for cutting super thin slices of cucumber, carrot, and onion for salads.

But, then, I got even more zucchini-noodle savvy and invested in a handheld spiralizer.  The spiralizer contains a series of blades that allows you to take a vegetable, for example a small zucchini, yellow squash, or even a carrot, and create uniform strands of noodles!  Many spiralizers out there are a bit fancier and, also, more expensive than the one I got.  But, mine is compact--good for my small kitchen--and was about $30 on Amazon.com.  

GEFU Spirelli Spiral Cutter

The bottom line is that zucchini noodles don't have to be a pain in the wrist to make, and depending on what produce goes for in your area, they're much cheaper than the Shirataki Noodles are.  You also don't have to cook them--at all!  

How Do I Cook Them?:
The short answer is--you don't!  

Merely place zucchini noodle strands in a colander and sprinkle on some salt and let them sit for about 20 minutes to tenderize them (gets ride of their crunchier raw texture by forcing out water).  Rinse the noodles thoroughly, squeeze excess water out of them, and pat them dry on paper towels.  

Serve with red sauce to make Italian style pasta, or serve with Pad-Thai peanut sauce (or whatever you want)!

I ate my zucchini noodles with sundried tomato pesto, fresh basil leaves, and fresh mozzarella.  YUM.


Sunday, January 13, 2013

Cauliflower "Hot Wing" and Spinach Salad with Blue Cheese Dressing

Cauliflower "Hot Wing" and Spinach Salad with Blue Cheese Dressing {Gluten Free + Vegetarian + Low Carb}


I have been a vegetarian for a long, long time.  And, I have my Dad to thank for this--ever swift to point out inconsistencies between what people profess and how they behave.  My Dad, relatively early in my life, pointed out the disconnect between the way I vocalized my responsibilities toward animals and my actual behavior--namely, my propensity to eat them.  And, though it was a struggle early on to change eating habits, my vegetarianism has persisted into adulthood and I don't  imagine ever giving it up.

If anything, I'm thankful for my vegetarianism: it has made me creative.  I sort of have to be creative, because there are meaty things that I crave--foods that I used to enjoy very much--that I like the challenge of making anew.  I try to re-create them in vegetarian form.  And, this post is about one such attempt to re-create a beloved meat dish, the hot wing, to fit my vegetarian lifestyle.  And, it was a successful attempt!

Blending the hot wing sauce, blue cheese dressing, and celery traditional to the hot wing meal, my Cauliflower "Hot Wing" and Spinach Salad with Blue Cheese Dressing is an amazingly satisfying nod to the beloved hot wings of my carnivorous past.  


Recipe: Cauliflower "Hot Wing" and Spinach Salad with Blue Cheese Dressing

Ingredients:
  • Cauliflower, 1 head chopped into florets
  • Hot Wing Sauce (I used a mix of Paula Deen's mild and hot hot wing sauces***); approx 1 cup
  • Approx. 1/3c. Garbanzo Bean Flour (I use Bob's Red Mill brand)
  • Approx. 1/3 Nutritional Yeast (I use Bob's Red Mill brand)
  • Pepper, to taste
  • Smoked Sea Salt, to taste
  • Liquid Smoke, a dash or to taste
  • Baby Spinach
  • Celery, chopped
  • Tomato, chopped (use to taste)
  • Red Onion, diced (use to taste)
  • Carrot, shredded (use to taste)
  • Avocado, sliced (use to taste)
  • Yogurt-based Blue Cheese Dressing
  • Queso Fresco, cubed (optional)
    *** Paula Deen's wing sauces do not list wheat in their ingredients lists.  However, they are not clearly labeled Gluten Free.  If you have celiac disease or a strong wheat intolerance than you may consider searching out a brand that explicitly labels their hot wing sauce Gluten Free.
Directions
  1. Preheat oven to 350 degrees F.; prepare baking sheet with aluminum foil.
  2. Clean and chop cauliflower into florets.  Dip cauliflower into hot wing sauce combined with liquid smoke.
  3. Coat dipped cauliflower in mixture of garbanzo bean flour, nutritional yeast, pepper and smoked sea salt.  
  4. Place on baking sheet lined with aluminum foil and bake in the oven for 20 minutes at 350 degrees F. followed by an additional 3-5 minutes on broil.
  5. Meanwhile, assemble salad fixings, including: spinach; tomato; celery; carrot; avocado; red onion; queso fresco (optional); Blue Cheese dressing
  6. Remove Cauliflower "Hot Wings" from oven.  Let cool a few minutes before tossing in leftover hot sauce and placing on top of salad.  
  7. Serve & enjoy!


Wednesday, November 14, 2012

Roasted Squash and Apple Salsa: 2-Ways

 Roasted Squash and Apple Salsa: 2-Ways

Apple Salsa: NOT some tomato-based, apple-saucy nightmare of a culinary creation.  I promise.

I'm a huge fan of the blog Love and Lemons; it's one of the food blogs I check most weeks and which helps fuel my recipe-pinning obsession on pinterest.  Recently I found posted to the blog a recipe for Roasted Squash and Apple Salsa and was intrigued by what was a really unexpected combination of flavors and ingredients.  

I embarked upon acquiring the ingredients, not entirely sure all the while whether I thought I'd love the final product or just take some sort of perverse satisfaction out of being open minded enough to try such a strange concoction.  My boyfriend was also a bit skeptical when I told him what was on the menu for Tuesday night.  Apple salsa?  There flickered across his face a moment of hesitation, maybe even a disbursed sense of confusion and horror as he imagined what this "apple salsa" business might entail.  His consternation was only momentary however, as he quickly settled back down into his customary I'm-a-boy-who-eats-anything mode.


The Roasted Squash and Apple Salsa was incredibly easy to make and, what's more, it wasn't just some whacked-out Fall recipe to be made once in honor of the season and resurrected nevermore.  Instead, it was actually really delicious.  The boy-who-eats-anything thought so as well, admitting that the Apple Salsa on his dish was vastly different from the "Apple Salsa" of his imagination--some tomato-based, apple-saucy nightmare of a culinary creation that might find its home properly on something like the Food Network show Worst Cooks in America.

The ACTUAL dish is not tomato-based and the texture of the Apple Salsa is more along the lines of a chunky pico de gallo than a traditional salsa.  In my version of the recipe I used a combination of three different seasonal squashes--Butternut Squash, Acorn Squash, and a Pie Pumpkin--which I roasted until they were cooked but still firm (not mushy).  In my Apple Salsa I used one extra jalapeno and substituted leeks for scallions.  In addition to being milder, I think the leeks are just prettier than scallions!

Roasted Squash and Apple Salsa Version 1: The Vegan-in-Texas Fall BBQ Extravaganza Meal  {Gluten-Free + Vegan/Vegetarian + Low-Carb}

For my first version of the Roasted Squash and Apple Salsa I prepared the recipe as called for by Love and Lemon's original recipe.  However, as noted above I used leeks in place of scallions, added an extra jalapeno, and used a combination of different squashes--Butternut, Acorn, and Pumpkin--and cooked them until they were cooked but still firm, not mush.  In other words, shoot for the squash version of al dente pasta.

I served the Apple Salsa over the warm (not hot) diced squash using large ramekins as my dish (pictured above).  The white ramekins really made the colors of the squash and salsa pop, and as we all know we eat with our eyes before we eat with our mouths!  Seriously, it can make a substantial difference in your enjoyment of a meal if you take the time to boost its aesthetic.

I served the Roasted Squash and Apple Salsa with a Fall cocktail of my own creation in which I combined Sparkling Cider, Cranberry Cocktail Juice, and Campari.  I didn't measure anything and just eye-balled it, but you'll want the sparkling cider as your highest-proportion liquid and, of course, the Campari as your lowest-proportion liquid. 

And, because it's Texas, I figured I might as well serve up some oven-roasted barbecued extra-firm tofu and tempeh.  Much, I'm sure, to any real Texas Barbecuer's dismay.


Roasted Squash and Apple Salsa Version 2: The I'm Lazy and Hungry for Lunch Roasted Squash, Black Bean, Avocado, and Apple Salsa Burrito  {Vegetarian}

For lunch the next day I decided that a Roasted Squash and Apple Salsa Burrito using black beans, diced avocado, mild serrano salsa, and some plain 0% Greek Yogurt was my ticket to a tasty, lazy lunch.

Here's how to make your own I'm Lazy and Hungry for Lunch Roasted Squash, Black Bean, Avocado, and Apple Salsa Burrito:

What you need:
  • Leftover or fresh-made Roasted Squash and Apple Salsa; squash diced small enough to easily fit in burrito
  • 1 Large Burrito shell (I used a spinach variety)
  • 1/4 cup fat free Refried Black Beans
  • 1/2 Avocado; diced (or guacamole)
  • Your Favorite Salsa (I'd go Tomatillo Salsa or Serrano or Hatch Chili Pepper Salsa rather than regular tomato-based salsas)
  • 0% Plain Greek Yogurt (in place of sour cream)
Instructions:
  1. Heat up in separate bowls about 1/4 cup of fat free refried black beans and about 1/3-1/2 cup of the squash (you should dice it down even smaller to fit in the burrito better!)
  2. Dice 1/2 of an avocado or prepare guacamole to your taste
  3. Warm large burrito shell in microwave for specified time (check labeling) to soften
  4. Top with black beans, squash, avocado (or guacamole), your favorite salsa and apple salsa.  
  5. Roll to form your burrito.  Top with desired amount of 0% Greek Yogurt!  Enjoy!


Monday, November 12, 2012

Broccoli and Pea Soup with Bob's Red Mill Nutritional Yeast {Gluten Free + Vegan + Low-Carb}

Broccoli and Pea Soup with Bob's Red Mill Nutritional Yeast {Gluten Free + Vegan + Low Carb}

It's starting to get cold out there.  Not so much in Texas, but today it's a cool 63 degrees and not threatening to get too much warmer before the day is out.  It's a welcome downturn in temperatures in the midst of the record highs--in the 80's--that have been plaguing the state this year.  Apparently Texas didn't get the memo that Winter is just around the corner and Fall is already well settled-in.

Broccoli and Pea Soup with Bob's Red Mill Nutritional Yeast
It's hard to legitimate cooking up a pot of hot soup when it's 80-degrees outside, but in the (relatively) cool 60's I felt it was an activity well worth the effort and not likely to overheat me!  So, I made myself some broccoli and pea soup using a product I've been wanting to use--but hadn't had the chance to use--for a while: Bob's Red Mill Nutritional Yeast!  

What is Nutritional Yeast?

Nutritional yeast is a deactivated yeast.  It has a yellowish, flaky appearance slightly resembling corn meal.  I have to admit, it's not the most appetizing looking product at a first glance, but don't let the yellow coloring or flaky, dry texture fool you.  This is a tasty and nutritional product.

Nutritional Yeast is used frequently by vegetarian and vegan cooks to impart a nutty and cheesy taste while also lending whatever it's used in an added level of creaminess.  Nutritional Yeast is a complete protein (a sexy characteristic in the eyes of vegetarians and vegans!) and is high in vitamins, including the B-complex vitamins.  It is naturally Gluten Free and does not contain sugar or dairy.  
Bob's Red Mill Gluten Free Labeling

Nutritional yeast can be purchased at most specialty food stores, such as Whole Foods, or purchase directly from manufacturers online.  I like Bob's Red Mill Nutritional Yeast because of it's certified Gluten Free.

What Can I Use Nutritional Yeast In?  Or, Why Would I Bother?

In Vegetarian and Vegan Gravies for the Holidays!:

With the holidays right around the corner, Nutritional Yeast is a good product to know about.  It's an ingredient called for in many vegan, vegetarian, and  GF gravies that you can find recipes for online (for example this one: Vegetarian/Vegan Nutritional Yeast Gravy which could be easily adapted to be Gluten Free by substituting GF soy sauce and your favorite GF flour alternative).  

Nutritional Yeast is not just a seasonal ingredient for vegetarians and vegans who want to be able to eat their mashed potatoes and gravy like everyone else, though.

To Produce a Thicker, Creamier Texture:

Nutritional Yeast can be used to flavor and thicken everything from sauces (a post on vegetable pot pies using Nutritional Yeast coming soon!) to soups.  It can be used in place of traditional wheat flour in Gluten Free gravies as a thickening component, as well as in other sauces that require flour as a thickener.  It would also serve as a good substitute for flour in a roux, used in traditional New Orleans cooking, including Gumbo!

In Place of Bread-Crumbs for Gluten Free and Low-Carb Eaters:

For those who are Gluten Free eaters or Low-Carb eaters, it can be used in place of bread crumbs as a binder in things like lentil or meat patties or as a bread-crumb replacement to use on top of casseroles.  Although I haven't tried it--YET--I think Nutritional Yeast combined with hemp hearts would make a truly fantastic, crunchy casserole topper! 

As a Cheese Alternative for Vegan and Lactose-Intolerant Eaters:

The vegan and lactose-intolerant folks out there should take note of the fact that Nutritional Yeast is an effective cheese alternative.  It can replace cheese in dishes ranging from cheesy-mashed potatoes to macaroni and cheese (no joke!  Nutritional Yeast Macaroni and Cheese).  

The uses above are only some of the many ways Nutritonal Yeast can be used in cooking.  A quick online search for recipes incorporating it will yield plenty more results.  It's versatile in addition to being awfully tasty--as I found out when I made myself some Gluten-Free, Vegan, and Low-Carb Broccoli and Cheese Soup.

Recipe: Broccoli and Pea Soup with Nutritional Yeast

Ingredients

1-1.5 head broccoli (steamed until cooked but still slightly firm)
2 bags organic frozen peas (thawed)
1 large onion (finely chopped)
4-6 cloves garlic (finely chopped)
1.5-2 containers Vegetable Stock (depending on desired thickness)
1 Can Canellini Beans
Smoked Sea Salt, to taste
Pepper, to taste
3-4 Tablespoons Bob's Red Mill Nutritional Yeast, or to taste
1 tablespoon Olive Oil (or butter)

Directions

  1. Cut broccoli head into florets and steam in large pot with steam basket until tender but still firm.  Remove from heat.  Meanwhile, thaw frozen peas.
  2. Place chopped onion and garlic in large pot and cook in olive oil until onions are translucent.  
  3. In a blender process broccoli and peas in batches adding vegetable stock to help liquefy the ingredients.  Add each liquefied batch to pot with onion and garlic.
  4. When all of the broccoli and peas have been liquefied, add any remaining vegetable stock to the pot.  Add canellini beans.  
  5. Season with smoked sea salt (or regular sea salt), pepper, and nutritional yeast.  Add as much seasoning as necessary and additional vegetable stock depending on the thickness you desire for your soup.
  6. Bring to a simmer for 5-7 minutes.  Serve!


Monday, September 24, 2012

Smoky Hatch Chili, White Bean, and Broccoli Soup {Gluten-Free + Vegetarian + Vegan + Low-Carb}

Smoky Hatch Chili, White Bean, and Broccoli Soup: {Gluten-Free + Vegetarian + Vegan + Low-Carb}
Texans like grilling. A lot. But, for many of us who live in apartments in Houston, grilling isn’t always an easy option for meals. That’s why I’ve imported the smoky taste of the grill into this Hatch Chili, Broccoli, and White Bean Soup. Made with oven-roasted Hatch Chilis, smoked sea salt, and a dash of smoked paprika, the soup offers a hint of the grill’s satisfying smokiness while catering to audiences who are typically excluded from traditional grilling—vegetarians and vegans—in addition to those following low-carb and gluten-free diets. This soup, amendable to fit just about anyone’s dietary needs, packs the sweet, subtle heat characteristic of the celebrated Hatch Chili.

Hatch Chili Peppers

What are Hatch Chili Peppers, Anyway?

I had never heard of Hatch Chili peppers until I moved to Texas.  And, even then it took me about 5 years to learn of their existence.  Hatch Chili peppers are a seasonal ingredient produced in Hatch, New Mexico, the self-proclaimed “Chili Capital of the World”. Hatch Chili peppers become available in late August and have a short growing season. The peppers can be used in everything from Chilles Rellenos to soups and they can even be infused into chocolate. Several local grocery chains carry the peppers (Fiesta, HEB, Central Market) and HEB and Central Market both have dedicated Hatch Chili Festival events with featured Hatch Chili products for sale and even cooking contests.

[Recipe] Smoky Hatch Chili,White Bean, and Broccoli Soup

With a texture much like that of comfort-food soups like potato soup and broccoli and cheddar soup, this Hatch Chili, Broccoli, and White Bean Soup is great hot or cold and can be garnished with arugula and pepitas and shaved parmesan (omit for vegan).

Ingredients--

2 Hatch chilies (roasted in 450∘ F. oven for 7-10minutes and peeled)
1 large head broccoli (a little over 1lb or 7cups), cut into florets
3 tablespoons extra-virgin olive oil
1 yellow onion, diced
7 garlic cloves, minced
1 and ½ 15-ounce cans cannellini beans, drained
3 cups vegetable stock (low sodium preferred)
Smoked sea salt, to taste
Black pepper, to taste
Smoked Paprika, a dash
Hot pepper flakes, a pinch
To Garnish—
Roasted Pepitas, to taste
Shaved parmesan cheese, to taste (exclude to make vegan)
Arugula


Directions--

Roast Hatch Chilies under oven broiler for 7-10minutes or until skins are browned. Place chilies in air tight container or zip-lock bag to loosen skins. Remove and discard skins. Note: it is recommended that you use kitchen gloves when handling the chilies to prevent pepper burn from any that might be particularly hot.

Steam broccoli for 5 minutes or until tender but still bright green and firm; avoid overcooking. Set broccoli aside.

In large pot add olive oil and set burner to medium heat. Add onion and garlic. Cook until translucent, roughly 8-10minutes. Add smoked sea salt, pepper, smoked paprika and hot pepper flakes. Add cannellini beans and vegetable stock. Bring to a very low boil and cook roughly 5 minutes.

Transfer broccoli and bean mixture in pot in small batches to blender. Liquefy and transfer to large bowl. Continue to process batches of soup components in your blender until finished.

Serve soup warm or cold garnished with arugula, pepitas (roasted, salted pumpkin seeds), and shaved parmesan (omit parmesan if vegan).

Thursday, September 20, 2012

Pumpkin "Pie" Super Smoothie {Gluten Free + Vegetarian + Low-Carb}

Pumpkin "Pie" Super Smoothie: {Gluten Free + Vegetarian + Low-Carb}

The Fall is a magical time.  Beloved squashes come into season to festively line the produce section of grocery stores while, in other corners of the store, ghoulish Lady Gaga, Marilyn Monroe, Vampire, and Frankenstein Monster costumes haunt the shelves hoping for a chance for a great debut trick-or-treating on Halloween.  The Fall is crisp, and warm, and spicy.  It's like biting into a pumpkin pie, rich creamy and complex with warming nutmeg, cinnamon, allspice, and clove.

For the past week I've celebrated the coming on of Fall by drinking it up in the form of  a Pumpkin "Pie" Super Smoothie.  What a great way to indulge in Fall flavors every morning!  

Fall Squash
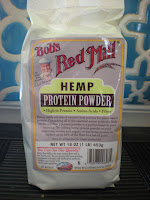
My Pumpkin "Pie" Super Smoothie is Gluten-Free, Vegetarian and Low-carb, and is made with organic pumpkin puree, 0% Plain Greek Yogurt, hydrated Chia Seeds, Almond Milk, a frozen banana, and those warming pumpkin pie spices I mentioned above, and Bob's Red Mill Hemp Protein Powder--a GREAT easily incorporated source of extra protein--that USED to be produced under Gluten Free certified conditions.

I'm sad to report that shortly after I got my batch of Hemp Protein Powder Bob's Red Mill issued a statement on their website saying that it is no longer going to be producing the product as Gluten Free.  While I give Bob's credit for posting the change in production quality, I'm disturbed by the switch from producing a Gluten Free certified product to a non-certified product and disconcerted that many potential consumers who've used the Gluten Free certified batches produced in the past won't have any easy way to learn about the change in the production standards.  


If you need an easy, Gluten-Free Hemp Protein replacement I've got you covered.  Try blending Hemp Hearts--easily available at specialty stores or online--into a powder and still enjoy that extra boost of protein and Hemp's nutty flavor.  This is going to be my new go-to solution for incorporating Hemp Protein into my diet.


[Recipe] Pumpkin "Pie" Super Smoothie

Bob's Red Mill Hemp
Protein Powder, formerly GF

Ingredients--

  • 1/3C. Organic Pumpkin Puree
  • 1/3C. 0% Plain Greek Yogurt
  • 4TBsp Hemp Powder (if no GF Hemp powder is available, grind Hemp Hearts into a powder in your blender)
  • 2-3TBsp Hydrated Chia Seeds
  • 1 Frozen Banana, peeled and chopped into sections
  • 1/4C. (approx) Almond Milk (I used vanilla, no-sugar-added variety)
  • 3-4 Ice Cubes
  • Pumpkin Pie Spices (cinnamon, nutmeg, allspice, clove)
  • Optional: Stevia or other sweetener

Directions--

  1. Blend all ingredients together in blender until smoothie consistency is achieved.  Serve immediately and enjoy!


Monday, September 17, 2012

Cauliflower Pizza Crust {GF + Low-Carb + Vegetarian}

Guiltless Cauliflower Pizza Crust: Gluten Free  +  Low-Carb  + Vegetarian


The Versatility of Cauliflower--Who Knew?

Cauliflower Pizza Crust
It seems apparent to me now that in spite of all of the time I've spent watching shows like Chopped and Iron Chef America on the Food Network that I know practically nothing about cooking beyond the most conventional forms of cooking knowledge--stuff like, don't chop your fingers off and salt your water before cooking pasta as well as an understanding of basic ingredient combinations and uses.  But, recently, with my growing interest in eating vegetarian, raw, Gluten Free, and low-carb foods I'm discovering a whole different set of cooking techniques and ingredients, as well as some surprising but wonderful uses for those ingredients.

Perhaps the most versatile ingredient I've been working with recently is cauliflower.  Cauliflower seems, in many ways, to be a magical vegetable to eaters of raw, Gluten Free, and low-carb diets.  You can make it into a lower-carb version of mashed potatoes referred to as "Cauli-mash" or "Cauliflower Mash," you can food process it into a raw rice-like substance called "Cauli-rice," and you can use the florets in place of noodles in an otherwise traditional-style macaroni and cheese (I highly recommend this, by the way!).  But, cauliflower has yet another trick up it's sleeve--it can become that food of the Gods, PIZZA!  

Cauliflower Pizza Crust

I've always heard that bacon is the hardest things for vegetarians and vegans to give up and, also, the hardest food for them to continue to resist eating through the course of their commitments to either diet.  I think pizza is that evil, siren of a food for a lot of Gluten Free and Low-Carb eaters.  In fact, I know that many people who have gone Gluten Free due to Celiac Disease or other issues crave pizza so much that they dream about it at night.

Happily, dreams can come true--at least in the realm of pizza consumption--regardless of whether you're eating a Gluten Free and/or Low-Carb diet through the versatile miracle that is cauliflower.  I discovered this through the website of The Detoxinista whose recipe for a cauliflower pizza crust formed the basis of my own.

The first time I made the cauliflower pizza crust I did not have all of the proper ingredients (I was  missing goat cheese) and I winged it, using a reggiano instead.  Needless to say, the recipe didn't turn out well.  BUT, it was a good trial and error experience because it led me to a Q&A with The Detoxinista about how to make the recipe itself--rather complicated--a bit more simplistic for the everyday, at-home cook.  And, it gave me a good idea of how much or little I can tweak the recipe without causing a pizza-tragedy to ensue.

Cauli-Rice
While the original recipe from The Detoxinista calls for food processing cauliflower florets into a rice-like consistency, steaming this "cauli-rice," and then putting it into a cloth to wring out the extra water, I found that this process can be significantly simplified.  Instead of steaming the "cauli-rice" and then expelling the water from it--which, frankly, was not pleasant as the "cauli-rice" did not cool quickly and the water expelled was very hot!--you can freeze the food-processed cauliflower florets (no cooking necessary) ahead of time, defrost in a colander and THEN proceed on to your squeezing.  Still, perhaps, a little time consuming, but at least this way you are squeezing out cold water onto your hands rather than nuclear hot water!

Before I get on, finally, to the recipe let me say that this Cauliflower Pizza Crust is simply amazing.  To boost the flavor profile, I added some fennel seeds, a dash of smoked sea salt, and pepper to the crust "dough" in addition to the oregano called for and, also, opted to use herb-encrusted goat cheese for extra herby-flavor.  In the future I'd like to add some fresh rosemary and maybe garlic to the crust.

I got a little more creative with my toppings than The Detoxinista in her post, using an organic store-bought red sauce, mozzarella cheese, crumbled herbed goat cheese, minced garlic, chopped spinach, sundried tomatoes, and a ton of fresh, chopped basil.  

[RECIPE] Cauliflower Pizza Crust

Ingredients
Baked crust waiting
for toppings!
  • 1 Medium-Large Head Cauliflower, broken down into Florets
  • 1 egg, beaten
  • 1/3 C. soft herbed Goat Cheese; plus more for topping
  • 1 Tsp. dried oregano
  • Fennel Seeds; to your taste
  • Smoked Sea Salt; to your taste
  • Black Pepper; to your taste
  • TOPPINGS--chopped spinach; goat cheese; mozzarella (fresh or shredded); organic red sauce; minced garlic; sundried tomatoes; fresh basil (chopped)
Directions
Done!
  1. Place cauliflower florets in food processor in batches and process into a rice-like consistency to make Cauli-rice.
  2. Freeze Cauli-rice in air-tight container or freezer bag.
  3. Remove Cauli-rice from freezer and let thaw in a colander; transfer to thin dish cloth or cheese cloth and wring out excess moisture.
  4. Beat egg and add 1/3 C. herbed goat cheese and Cauli-rice with excess water expelled; mix well to fully incorporate all ingredients.  Add oregano, fennel seeds, salt and pepper and mix.
  5. Cover a square or round baking sheet with parchment paper--Don't forget this!--leaving crust about 1/3inch thick (I just eyeballed it) press and form the dough into the pan making the edges a little higher to form a traditional crust-look.
  6. Bake at 400 degrees F. for 40minutes; remove from oven and cover with desired toppings before returning to the oven for additional 10 minutes.
  7. ENJOY!